ERRATA and Variants
“No plan survives contact with the enemy.”
– Correlli Barnett
Final 1.0 Errata
Note that most of these rule changes do not affect the Basic rules you will use for your first game.
1. Static Frontal Armor Defense (Advanced Rules): Similar to heavy cover for infantry, a heavy vehicle now receives 2 total defense dice when hit by Armor Piercing damage in it’s frontal arc. This is a static defense vs the printed versions variable defense. In the print rules frontal armor defense is a ‘resistance’ which means you get a defense die for each point of Armor Piercing damage assigned to your frontal arc. This change to a static defense reduces the amount of frontal armor increasing the value and tactical importance of units that deal AP damage. For example, with static frontal armor, if 4 points of AP damage were assigned to a Heavy Vehicle’s frontal arc, that unit would still only roll 2 defense dice.
2. HE Resistance & Reduced Crits (Advanced Rules): If a unit is resistant to High Explosive (HE) damage, that unit rolls a defense die for each point of damage dealt. For example, if a defending unit has 1 HE assigned to him and the attacker rolls a crit, the defending unit rolls 2 defense dice. (In the print rules it was for each HE die, not each point of HE damage.) Also, HE only crits on the green HE symbol not the green speed symbol. This reduces the effectiveness of HE damage vs vehicles and indirectly makes AP damage more effective like the rule above.
3. Retreat Step and Full Spawn Retreat. (Advanced Rules) Units can retreat to any hex on their spawn point. The team that goes first can choose to retreat units at the end of the maneuver phase. This allows the team going first to adjust to last minute movements of the team going last, making it more fair for the other team. In RTS mode, all players can choose to retreat units after the Maneuver Phase is over but before the Damage Phase.
4. Moving While Pinned. (Advanced Rules) This is how the game was tested primarily but was removed to reduce pinning complexity. In the advanced rules, during the Maneuver phase, units may move or construct field defenses while pinned by paying an additional CP/Speed Die for each movement or action and by paying 1 health for each movement or action. (They still cannot attack during the Damage Phase, nor capture points during the Supply Phase.
5. Expansive Cover System. (Advanced Rules) Cover is now triggered if the attack line runs adjacent to the cover line. i.e. cover is triggered if the attack line only ‘nicks’ the cover line. As before, units only receive cover if they are in a hex with cover. When line of fire goes crosses between two types of cover defender utilizes the better cover.
6. Variant Turn Order: Simple: Alternate which teams goes first regardless of victory point count or resource incomes.
7. Variant Turn Order: 3663 After you have a few games under your belt, you can try out the variant turn order in order to reduce the advantage of going last. This variant turn order developed by Bryan “Bryk” The Rabblerouser on Discord is referred to as 3663. The maneuver phase is divided into only 2 turns instead of 3. The first team spends 3 cp, then then second team spends 6 CP. Then the first team spends 6cp and finally the second team spends 3 cp. This reduces the advantage of going last in a round, but also slightly reduces the catch up mechanic in the game thus is better for evenly matched players.
We recommend that players learn these rules before playing the advanced rule set. But for edits to Commander cards you can wait to reference the Commander Section below until you are choosing a commander in game. Alternatively any edited Commander Cards can be found in the Commander Gallery as well.
We will continue to test, tweak and fine-tune the Company of Heroes Board Game basically forever. We will not stop trying to improve the game! We are also currently developing a system to hear and process your feedback after you start playing. For now, join our discussion of current and future rules in our amazing Discord Channel.
Commander Improvements
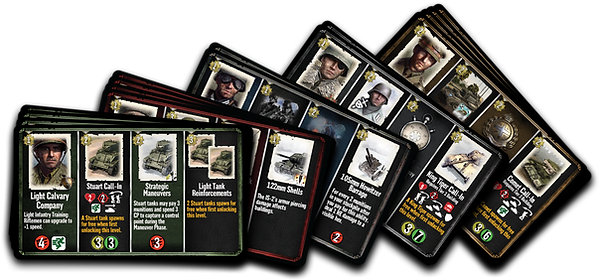
Commander Card clarifications can also be found on the Commanders Page. Players can print out edited Commander cards if they desire. We will be adding a printable pdf version of affected commanders using an Avery Adhesive Label template for those who want to update their cards before the planned update kit.

Core Commanders – (1)
- Jaeger Infantry Doctrine (Wehrmacht): Tier 1 XP cost raised from 1 to 2. Tier 3 ability requires at least one of the hexes of the artillery barrage to be visible (the printed version does not specify this). This Commander was slightly over-powered so these changes help balance this commander.
Elite Commander Collection – (5)
- US Motor Pool & Cavalry Company: Stuart Tanks require a Tier 2 Building to spawn. Calliope has turreted damage, (the printed version shows a fixed turret).
- Soviet Urban Assault Tactics: The KV-2 Assault Gun has Splash damage but is missing the corresponding symbol.
- Tank Destroyer Doctrine West: The Jagdpanther has a fixed gun but incorrectly shows a turret. Puma requires a Tier 2 Building.
- Royal Armored Corps / British Specialized Vehicle Regiment: The first tier costs 2 experience to unlock. (This delays an early Sexton rush). These are the same Commander card – they may be named differently online than in print.
StuG Assault Pack (3)
- StuG Assault Doctrine: Stormtroopers have 4 health and not 3. StuG requires a Tier 2 Building.
- StuG Tactics: The StuG costs 3 Manpower, not 2 Manpower. StuG requires a Tier 2 Building.
- Devil’s Brigade: Can move into and through all obstacles except enemy units. For example, water, impassable terrain, and into destroyed buildings. Destroyed buildings act as normal buildings for the Devil’s Brigade, including providing them heavy cover.
Alternate Maps & Map errata
hese are alternate popular ways to play some of the maps found in the Mission Book. Also visit the Community Maps page for more scenarios, maps and setups.
1. Alternate Starting Resources: Starting incomes and stockpiles can be adjusted for each map! If agreed upon by both teams. The most popular starting resource system count is to keep incomes at 1 each but modify the stockpiles to:
- Manpower 6
- Munitions 4
- Fuel 2
This provide an extra emphasis on the early game and infantry, increasing the time before players can produce a tier 2 light vehicle like the T-70, Stuart Tank, Greyhound, Staghound and 222 Armored Car. Delaying these vehicles by even one round makes for a more enjoyable and distinct early game. You can also adjust your starting stockpiles or even your incomes depending on the map. For maps with scarce manpower points or fuel points, opposing teams can agree to increase their starting Manpower income to 2. Take note however that the more you increase your incomes the less important capturing resource control points will become.
2. Sturdy Buildings Variant: You can adjust the building health on the to be 5 or for even stronger buildings 6 health. This will make regular infantry and machines gun squads more viable later into the game.
3. Stalingrad Multi-Hex Buildings: The Stalingrad double buildings are shown as individual adjacent buildings. We recommend playing with these as multi-hex buildings. The difference is more than one team can enter a multi-hex building and units can move freely around inside a multi-hex building without ending their turn, (they still cannot leave a multi-hex building on the same round that they entered however). Each section of these two hex buildings can be destroyed independently. See here for a diagram of the multi-hex buildings. Click here to see errata-ed map changes.
4. No Man’s Land Conditions: On this map the starting income should be 2 Manpower, 2 Munitions, and 2 Fuel while the starting stockpiles should be 4 Manpower, 4 Munitions, and 1 Fuel. The recommended Victory Condition is 8 Victory Points. The Retreat Point for Team 1 is on the fourth hex east from the edge of the map in the Team 1 Spawn Zone. Click here to see errata-ed map changes.
5. Trois Ponts Bridge Paths: The hexes that the bridges connect to on Trois Ponts can be a bit vague graphically. Use this diagram to when questions arise about which hexes connect to a bridge or not. Bridge Diagram


